Editing
Intro to Editing
You can use Info Select as a basic word processor by using the Note data type. In Notes, you can find and replace text; change text color, style or size; set page indentations and justifications; join lines; stamp the date or time; undo deletions; insert images; create bulleted or numbered lists; insert tables and boxes and more.
In contrast to word processors, each document is not saved as a separate file. This saves you the time of assigning and managing files. Also, you can bring related documents together quickly through Info Select‘s high speed Search feature and organizing features.
Creating Notes
Creating Notes
Create a Note when you need to write a letter, record an idea, draft a report, or do any other basic word processing task.
[:] To create a Note:
- Choose Menu Ribbon | Insert | Note (F7). You will see a flashing cursor in the Selector.
- Enter a caption (title) for the Note if you wish and press ENTER.
- Type your information into the Workspace. Use the commands on the Note Menu Ribbon to format your text.
- Press ESC to finish editing.
You can enter one-line notes. For example, you might enter a todo item or a reminder.
[:] To enter a one line-note in the Selector:
- Choose Menu Ribbon | Insert | Topic (F11).
- Type the note text and press ENTER or ESC finish editing.
Editing Notes
Editing Notes
You can edit Notes to revise information, add new material, delete text, and make other changes. For example, you may need to make changes to a marketing plan you composed in a Note.
[:] To edit a Note:
- From the Selector, choose the Note.
- In the Workspace, click inside the Note text or press F2 twice.
- Make the necessary changes.
- Press ESC to finish editing.
Info Select can remember the cursor location in a Note between Edit sessions so you can automatically return to the last cursor position. This feature works when you press F2 twice to edit.
[:] To retain the edit cursor position:
- In the Selector, choose the Note.
- Check Menu Ribbon | Selector | Item Properties | Retain Edit State.
Tip: Use SHIFT + ENTER to create a new line without creating the new paragraph.
Standard Editing
Standard Editing
Info Select provides the same editing features found in standard Windows applications.
To move up or down through text in a Note, use the PGUP, PGDN, HOME, END or ARROW keys. Use CTRL + RIGHT ARROW or CTRL + LEFT ARROW to move the cursor to the next or previous word. Use CTRL + HOME or CTRL + END to move to the top or bottom of a Note.
To select (highlight) a section of text, click and hold down the mouse button and drag the mouse over the desired text, or hold down the SHIFT key and use the keyboard arrows to select the text.
To select all the text in a Note when editing choose Menu Ribbon | Select All.
To delete text, press the DELETE or the BACKSPACE key or highlight the section of text and press the DELETE key.
Press the INSERT key to toggle between the Insert or Overwrite mode. A narrow flashing cursor appears for Insert mode. A wide flashing cursor appears for Overwrite mode. Insert mode inserts your text into the Note where you have positioned the cursor. Overwrite mode types over your existing text.
You can use the Menu Ribbon | Home | Cut, Copy, and Paste commands to move sections of text within a Note or transfer text to other Notes. Use Menu Ribbon | Home | Paste | Paste Special to select a specific format for the pasted text. To paste text in the Plain Text format use Menu Ribbon | Home | Paste | Paste as Plain Text. These clipboard functions can also be used to move and copy items in the Selector.
To paste images into Info Select Notes, use Menu Ribbon | Home | Paste, not Menu Ribbon | Home | Paste | Paste Special which uses the inefficient DIB format. Click here for more information about inserting images into Notes.
You can move text in a Note using your mouse.
[:] To move text with your mouse:
- Highlight the text you wish to move.
- Drag the text with your mouse to the new location by clicking and holding down the left mouse button on the text, then dragging it to another location. While you are dragging, you will see the cursor change to an arrow with an empty box and you will see a vertical line indicating where the text will be placed when you release the mouse button.
[:] To change text formatting quickly:
- Highlight the text.
- Apply one of the commands that appear on the Note Menu Ribbonor …Right-click in the Workspace and select the desired action from the floating Mini Toolbar.
Tip: Click here to learn more about word processing features.
Font Style Color Size
Font Style Color Size
You can change the appearance of your text in several ways.
[:] To bold, underline, italicize, strikeout, color or re-size text:
- If you want to format existing text, highlight the text. Otherwise, set the formatting, then type in your new text.
- Click the Menu Ribbon buttons to make your text appear:
- Bold
 (CTRL + B)
 - Italic
 (Ctrl + I)
 - Underlined
 (Ctrl + U)
 - Strikeout
 (CTRL + SHIFT + K)
 - Superscript

- Subscript

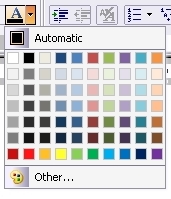
- To change the text color, select the desired color from the dropdown box on the Menu Ribbon
- To change the text size or font, select the desired Font and Size on the Note Menu Ribbon.
[:] To remove a bold, underline, italicized, strikeout, super- or subscript style:
- Highlight the text.
- Click the Bold, Underline, Italics, Strikeout, Superscript or the Subscript button once or twice as needed.
You can highlight portions of text with different colors by changing the text background color. For example, you may want to mark a sentence with a Yellow background color.
[:] To change text background color:
- Highlight the text.
- Click the Text Background Color button
 and select the desired color.
Default versus Fixed colors
There is an “Automatic” box in the color palette. Use the default automatic box to set the color of text to your default Note text color. (To set your default Note text color, choose Menu Ribbon | Tools | Options | Font | Notes, Documents, Grids.) One color appears twice in the Color Palette. For example, the color black may appear in the default box as well as in another box in the Color Palette. The black in the leftmost box is a “fixed” black while the black in the default box represents your default color. When selecting colors, choose the color from the correct box. For example, if a section of text is red and you want to change it to black, it is usually better to choose the “default” black instead of the “fixed” black. This way, if you ever change your default to a color other than black, the text will change to your new default color. Similarly, if you e-mail a Note to another user who has a different default color, that user will maintain the default color for that portion of text.
Formatting Text
Formatting Text
You can indent, justify or center a selection of text.
[:] To indent, center, or left or right justify text:
- If you are formatting more than one line, highlight the text. For one line, simply place the cursor anywhere in the line.
- Choose the desired indentation options on the Note Menu Ribbon. Use the Ruler at the top of the Workspace to adjust the indentation. or…Right-click in the Workspace and choose Paragraph from the Pop-up menu. A dialog box appears:
- TheLeft and Right boxes allow to set the indentation from left and right, and the First Line box allows to specify the indentation of the first line in a paragraph. The values can be positive or negative (i.e. 1.00 or -1.00).
- Select the Alignment options (Left, Center or Right).
- Click OK.
Note: If text does not appear centered after using the center feature, it is usually due to spaces before or after the text. These spaces should be deleted.
Note: Many users are familiar with CTRL + R to right justify text. This key is used for another function in Info Select. To right justify text, use the Align Right button on the Note Menu Ribbon.
You can change the Tabulation positions for an individual Paragraph or several Paragraphs.
[:] To change the Tabulation positions:
- In the Note, highlight the Paragraph (or several Paragraphs) of text.
- Click the bottom of the Ruler to set the tabulation position. A tabulation mark will appear:
Note: To remove the Tabulation positions, drag them with your mouse to the left corner of the Ruler.
Changing Case
Changing Case
You can change text to all upper or lower case characters, capitalize each word in a sentence or reverse case.
[:] To change text case:
- In the Note, highlight the text.
- On the Menu Ribbon click the Font Case button.

- Select the desired option from the drop down list.
Stamping
You can stamp the current date or time or a sequence number into your text. You can stamp manually or automatically. First you may need to configure the stamping feature.
[:] To configure the Stamping feature:
- Choose Menu Ribbon | Home | Tools | Options | Stamping.
- Choose the Stamp you want to configure from the radio buttons at the left side of the dialog box: Date, Time, Sequential numbering, Address or Caret.
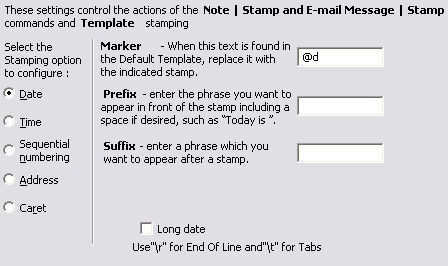
- In the Prefix field, enter the phrase you want to appear in front of the stamp including a space if desired, such as “Today is ”.
- In the Suffix field, enter a phrase you want to appear after the stamp including a space if desired, such as “\r\r” for two hard returns.
- Click OK.
Tips: Check Menu Ribbon | Home | Tools | Options | Stamping | Date | Long date to stamp Date in the long format (i.e. Tuesday, July 02, 2002). Check Menu Ribbon | Home | Tools | Options | Stamping | Time | Show Seconds to include seconds in Time stamping (i.e. 8:07:33 AM).
You can set Info Select to automatically stamp items. For example, you may want your invoices to have the date automatically inserted in the first field.
[:] To automatically stamp items:
- In the Selector choose a Template or Default Template.
- Position your cursor in the Template text where you want the stamp to appear.
- Enter @D for a date stamp and/or @T for a time stamp. Use @K to count items sequentially.
- Press ESC to finish editing. When the Template is used the stamp will appear.
You can automatically extract an address from a Note and stamp the address when a Template is used. To use this feature place @A in the master Template. Addresses will be recognized if they contain three to five lines of 7 to 40 characters closing with a zip code of one or more digits or a single quotation mark after a non-numeric zip code. If there is more than one address in the Note the first will be used.
You can change the Stamp Marker to another string. For example, you can change the Date Stamp Marker from @D to #date.
[:] To change a Stamp Marker:
- Choose Menu Ribbon | Home | Tools | Options | Stamping.
- Choose the Stamp you want to configure.
- In the Marker field, enter the string you want to use for that Stamp Marker.
- Click OK.
While editing, you can insert the current date or time into the text of an item to provide a record of when you did something.
[:] To stamp the current date or time while editing:
- Choose Menu Ribbon | Stamp | Date or Time.
You can stamp items sequentially (e.g., 101, 102, 103, …) for numbering documents, purchase orders, invoices, etc.
[:] To stamp items sequentially:
- In the item, position the text cursor at the location where the sequence number should appear.
- Choose Menu Ribbon | Stamp | Sequential Numbering.
To reset the stamp counter, enter 1 in Menu Ribbon | Home | Tools | Options | Stamping | Sequential Numbering | Current Value.
Tables
You can insert a Table into a Note. For example, you might want to create a table of images with text next to each image or an grid of numbers.
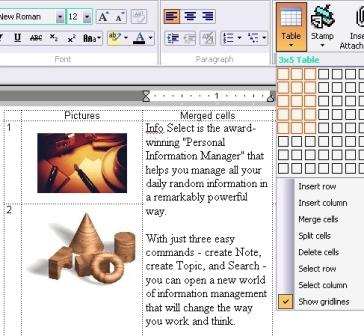
[:] To insert a Table:
- Select the desired location in a Note.
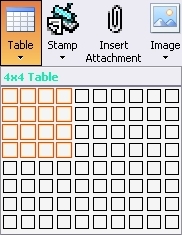
- Choose the Menu Ribbon Note | Table button.
- Move the mouse cursor to select the desired size of the table and click.
[:] To resize Column width:
- Click on the right side of a column divider.
- Drag the column edge to the new width.
[:] To resize Row width:
- Click on the bottom side of a row divider.
- Drag the row edge to the new height.
[:] To insert new Column:
- Click on a cell in the table.
- Choose Menu Ribbon | Note | Table | Insert Column. A new column will be created to the left of the selected column.
[:] To insert new Row:
- Click on a cell in the table.
- Choose Menu Ribbon | Note | Table | Insert Row. A new row will be created above the selected row.
[:] To merge a group of cells into one cell:
- Select a range of cells.
- Choose Menu Ribbon | Note | Table | Merge Cells.
[:] To split a cell into two cells:
- Click on a cell in the table.
- Choose Menu Ribbon | Note | Table | Split Cell.
[:] To delete cells:
- Click on a cell in the table or select a range of cells.
- Choose Menu Ribbon | Note | Table | Delete Cells.
Undoing a Delete
Undoing a Delete
While editing, you can recover the last deletion of text.
[:] To recover deleted text:
- Choose Menu Ribbon | Home | Undo. The deleted text will be restored.
Also see the Revert command.
Removing Formatting
Removing Formatting
You can remove fonts, point size, color, bold, underline, italic, strikeout and indentation. For example, you may want to remove all color from a Note, all uses of “bold”, and all varying point sizes.
[:] To remove formatting from a Note:
- From the Selector choose the Note.
- Choose Menu Ribbon | Note | Remove Formatting… and choose the styles you wish to clear.
- Click OK.
You can also remove formatting from the portion of the Note’s text. For example, you can clear the indentation from several paragraphs.
[:] To remove formatting from a portion of text:
- From the Selector choose the Note.
- Highlight the desired portion of text.
- Click the Remove Formatting button
 on the Menu Ribbon (or choose Format | Remove Formatting…).
 - Choose the styles you wish to clear and click OK.
Selector Browsing
Selector Browsing
Just as you can browse backwards or forwards in a web browser, you can do the same in Info Select. For example, if you are interrupted while editing a Note because you need to view an item elsewhere in the Selector, you can easily return to the original item you were editing.
[:] To browse through your last several edit locations in the Selector:
- Press ALT + BACKSPACE to browse backward or SHIFT + ALT + BACKSPACE to browse forward. Or use the Back and Forward buttons on the toolbar.
Note: The browse feature does not apply to the Web Viewer.
Bookmarks
Bookmarks
Info Select version 11
Bookmarks allows you to quickly access an information by not having to scroll down the page.
[:] To insert a Bookmark to a Note text:
- Set caret to the position in the text where you want to place the Bookmark.
- Choose Menu Ribbon | Note | Bookmark – a dialog box should appear:
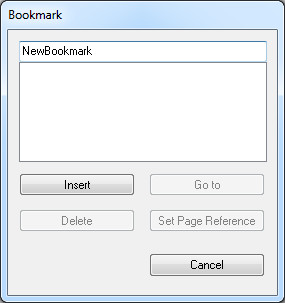
- Enter the Bookmark name in the top field of the dialog box.
- Click Insert.
[:] To find a Bookmark in a Note:
- Choose Menu Ribbon | Note | Bookmarks – a dialog box should appear:
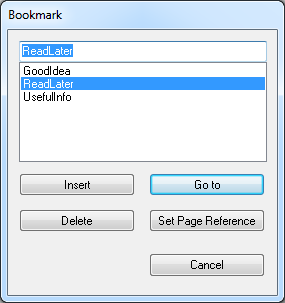
- Highlight desired Bookmark in the list.
- Click Go to.
[:] To remove a Bookmark:

- Choose Menu Ribbon | Note | Bookmarks – a dialog box should appear:
- Highlight desired Bookmark in the list.
- Click Delete.