Word Processing
You can use Info Select for basic word processing. This allows you to organize your documents with data that relates to those documents. You can also locate documents using Info Select’s powerful search feature. This section extends the material in Editing.
Finding Text
Finding Text
You can find any word or phrase in a Note with the Find command. This is different than the Tools | Search command, because only the highlighted item, and not the entire Selector, is searched initially and only the first occurrence of the word is displayed.
[:] To find a word or phrase inside a single Note:
- In the Selector, choose the Note.
- Click inside the Note at the upper left corner (to begin the search at the top).
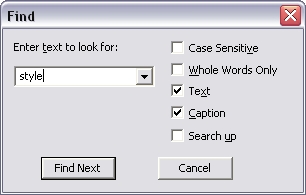
- Choose Menu Ribbon | Home | Find… (or press CTRL+F). A dialog box appears.Enter the word or phrase you want to find. Check Case Sensitive if you want the search to be case sensitive – when unchecked, both “Apple” and “apple” will be found, regardless of how the item was originally entered.
- To search for whole words (e.g. some but not something) check Whole Words Only.
- Press ENTER. The text cursor will move to the first occurrence of the word or phrase after the current cursor position. If no match is found, the cursor will remain in its original position.
- To find the next occurrence of the word or phrase choose Menu Ribbon | Find | Find Next (or press F3). If no match is found, the cursor will remain in its original position.
On subsequent use of the Find Next command, Info Select will skip to the next item in the Selector containing the phrase. You can use this command repeatedly to find all occurrences.
Tip: You don’t have to be in the edit mode to use the Find Next command – you can issue the command after a search to find the first and subsequent occurrences of a word or phrase.
Search and Replace
Search and Replace
You can automatically replace every occurrence of a word or phrase with a new word or phrase. For example, you might want to change “Smith” to “Mr. Smith” in several items of correspondence.
[:] To search and replace:
- In the Selector, choose the item to be changed.
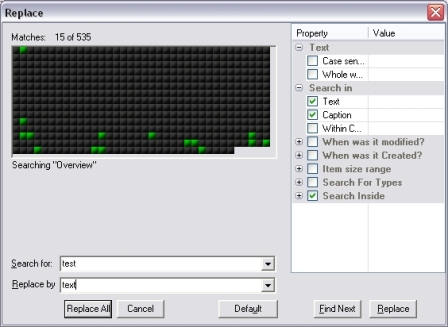
- Choose Menu Ribbon | Home | Find | Replace…. A dialog box appears.
- In the Find box, enter the text you want to change.
- In the Replace By box, enter the replacement text.
- Choose the desired options. Case Sensitive will allow you to search only for text matching the word or phrase exactly, including upper/lower case. Whole Words Only will skip occurrences of text inside other words (e.g. replacing “some” will not effect occurrences of “something”). Uncheck Text or Caption to search in Captions or Text only.
- Press Find Next. Then choose Replace if you want to review each replacement before it occurs or Replace All if you want to complete the task in one step. If you use Replace, you can also skip an occurrence of the word or phrase by clicking the Find Next button. To reset the Replace dialog settings click Default button.
- When you are finished replacing items click Close. You will see a message telling you how many occurrences of the word or phrase were replaced.
Spell-Checking
Spell-Checking
You can check and correct spelling errors in text.
[:] To find and correct misspelled words:
- From the Selector, choose a Note or Topic or highlight a portion of text in a Note.
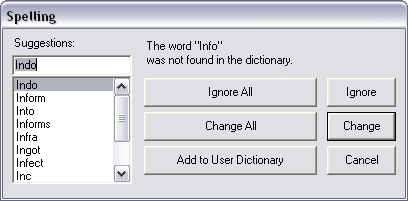
- Choose Menu Ribbon | Home | Tools | Spelling (CTRL+G). When a misspelled word is found, a dialog box appears. The misspelled word will appear on the first line of the dialog under Misspelled Word.
- In Suggestions, enter the correct spelling of the word or select the correct spelling from the list of possible spellings. Note that the most closely related word will appear in the Suggestions field.
- Click the Change button to correct the misspelled word or click the Change All button to correct all occurrences of the misspelled word.
- If you don’t want to change a word’s spelling, click the Ignore button to skip over the word or click the Ignore All button to skip all occurrences of the word.
- If the Spell Checker flags a word you know is correct, click the Add to User Dictionary button to add the word to the dictionary.
- Repeat steps 3 to 6 as necessary.
Note: Info Select uses a specific dictionary format, which cannot be loaded from other applications.
Group Editing
Group Editing
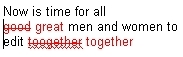
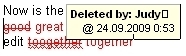
You can edit documents as a team, tracking individual changes and recommendations by color. The originator of the document then has the option of accepting or rejecting markup suggestions. For example, you might want to send an advertisement to your co-workers for their edits and suggestions. You would ask each of them to mark their changes with the tracking feature enabled and to send the text back to you.
[:] To edit and track changes in a Note:
- In Selector, choose the Note you want to edit.
- Choose Menu Ribbon | Note | Track Changes | Enable Tracking.
- Make your edit changes.
[:] To accept or reject a change
- Disable Menu Ribbon | Note | Track Changes | Enable Tracking.
- Place the mouse cursor on the changed word or phrase.
- Choose Menu Ribbon | Note | Track Changes | Accept Change or Reject Change.
[:] To accept or reject all changes
- Disable Menu Ribbon | Note | Track Changes | Enable Tracking.
- Choose Menu Ribbon | Note | Track Changes | Accept All Changes or Reject All Changes.
The Track Changes feature shows the author of modification and modification time via a tooltip.
[:] To see the author and modification time:
- Point the mouse cursor to a changed word.
To e-mail documents that have been edited with the tracking feature place the documents in a Topic and insert the Topic inside the E-mail in the Selector.
Text Statistics
Text Statistics
You can view text statistics, including the size, date modified, number of characters, words and paragraphs in a Note. For example, you might want to know when you did something months ago by checking the date on which you entered a relevant note.
[:] To view text statistics:
- In the Selector, right-click the Note.
- In the pop-up choose Item Info…
Bullets and Numbering
Bullets and Numbering
You can create Bulleted or Numbered lists in Notes. For example, you could create a Note containing numbered steps in a procedure or a bulleted list of features of a product description.
[:] To create a new Bulleted or Numbered List in a Note:
-
- In the Selector, choose a Note and click in the Workspace to start editing the text.
- Click the drop-down box at the right site of Menu Ribbon | Note | Numbering or Multilevel Bullets button. The drop-down Numbering Library appears.
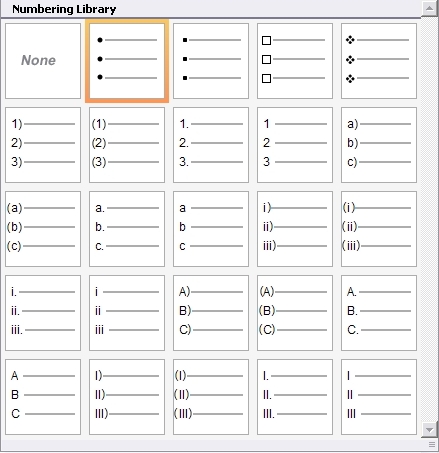
- Choose the desired Bullets or Numbering style. The first line of the Note will contain the appropriate Number or Bullet.
Type in some text. Press ENTER to create a new List entry. For Multi-Level Numbering you can also press TAB or SHIFT+TAB to increase or decrease the Numbering level.
To remove an item from the List, place the cursor at the beginning of the List entry and press BACKSPACE twice. To remove Bulleting or Numbering, select the Numbered (Bulleted) text, choose Menu Ribbon | Note | Numbering and click None.
You can also add Bullets or Numbering to existing text.
[:] To add Bullets or Numbering to existing text:
- Select the text and choose Menu Ribbon | Note | Numbering or Multilevel Bullets button. The drop-down Numbering Library appears.
- Select the desired Bullets or Numbering style. Each line of the selected text will contain the appropriate Number or Bullet.
QuickText
QuickText
You can create a set of commonly used words or phrases for use when editing. For example, when working with e-mail messages you may often need to type phrases like “Thanks for your message”, “Sincerely yours”, “Best regards”, etc.
[:] To add QuickText phrases:
- Choose Menu Ribbon | Home | Options | QuickText. A dialog box appears:
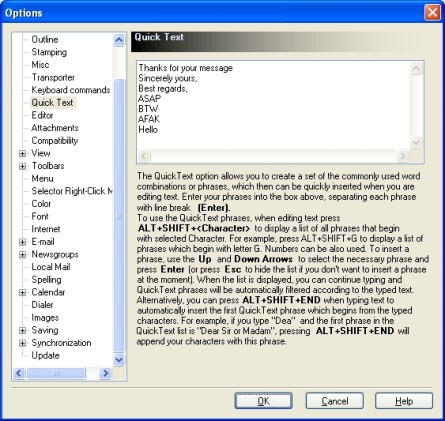
- Enter the phrases, one per line.
- Click OK.
[:] To use QuickText phrases:
-
- While in the Edit mode, press ALT+SHIFT+ to display the list of phrases that begin with a selected Character. For example, press ALT+SHIFT+G to display a list of phrases beginning with G. Numbers can be also used.
- To insert a phrase, use the Up and Down Arrows to select the necessary phrase and press Enter. Press Esc to hide the list if you don’t want to insert a phrase. When the list is displayed, you can continue typing and QuickText phrases will be automatically filtered according to the typed text. Alternatively, you can press ALT+SHIFT+END when typing text to automatically insert the first QuickText phrase which begins from the typed characters. For example, if you type “Dea” and the first phrase in the QuickText list is “Dear Sir or Madam”, pressing ALT+SHIFT+END will append your characters with this phrase.