Miscellaneous Features
Selector Features
Selector Features
This section describes how to work with Selector – the left part of the screen where data is organized.
Creating and Deleting Items
You can store your Info Select data in a variety of item types such as Notes, Topics, and Databases. Choose the type best suited to your data. For example, if you plan to create a memo you might choose to use the Note type. To enter a quick idea, you might choose a Topic.
[:] To create an item:
- In the Selector, choose the item immediately above the desired location for the new item. To place the new item inside a collapsed Topic, first click the Topic’s triangle icon to make the triangle point down.
- Choose Menu Ribbon | Edit and from the Insert group, select the desired data type (or use the accelerator key listed on the menu). The new item will appear in the Selector with a flashing cursor indicating you can enter a caption.
- Enter a caption for the item.
- For Topics, press ENTER to finish editing or CTRL + ENTER to create another Topic. For Notes, press ENTER to move the caret to the Workspace where you can create the body text and then press ESC to finish editing.
You can delete items from the Selector when you no longer need them. For example, you might wish to delete a note regarding a finished task.
[:] To delete an item in the Selector:
- From the Selector, choose the item to be deleted.
- Press the DELETE key on the keyboard. A confirmation dialog box appears.
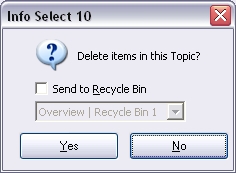 Instead of deleting an item, you can send it to a Recycle Bin. Check the Send To Recycle Bin option and select the appropriate Recycle Bin in the list. If there are no Recycle Bin items in the Selector, Info Select will automatically create one at the bottom of the Selector.
 - Click Yes.
If an item is deleted by mistake, to restore it click the Menu Ribbon | Home | Undo button.
You can prevent certain items from being deleted. For example, you might wish to protect an important note containing passwords.
[:] To protect an item from deletion:
- In the Selector, choose an item.
- Check the Menu Ribbon | Edit | Properties | Lock from deleting option. An
 icon will appear near the item caption. A Topic which contains the selected item will also have the icon to indicate that this topic contains an item which was protected from deletion. When you attempt to delete such item, you will be warned that the item has been protected from deletion. To remove the protection, uncheck Menu Ribbon | Edit | Properties | Lock from deletion.
Note: Deleting a collapsed Topic removes the Topic and its contents. Deleting an expanded Topic removes only its contents and not the Topic itself.
Joining and Splitting Items
You can join two items into one. For example, you might want to join several Notes to create a first draft of a report.
[:] To join two items together:
- From the Selector, drag one of the items so it appears just below the other at the same level of indentation.
- Select the first of the two items.
- Click the Menu Ribbon | Selector | Join button. (When notes are joined, a Split Marker is placed in the new Note to indicate the point at which the notes were joined. The split marker is specified under Menu Ribbon | Home | Options | Editor | Note Delimiter.)
Note: Items to be joined must be the same type, such as two Notes or two Topics.
You can split one Note into several Notes. For example, you might want to split a Note containing phone conversations between each conversation. This would provide one Note per conversation.
[:] To split one Note into multiple Notes:
- Insert Split Markers (specified under Menu Ribbon | Home | Options | Editor | Note Delimiter) at each point where the Note is to be split. The default Split Marker is two dashes alone on a line. (This appears as “\r–” under Menu Ribbon | Home | Options | Editor | Note Delimiter where “\r” represents a new line.)
- To the right of each Split Marker you can specify a caption that will appear on the resulting Notes.
- Click Menu Ribbon | Selector | Split.
Note: If a Split is performed on a Note that has no split markers, the Note will be divided at every line (all text up to a hard return).
Duplicating Items
You can make duplicate copies of Notes, Topics, Calendars, or any item in the Selector. For example, if you are writing an important memo you might want to create a duplicate to try another variation.
[:] To duplicate an item:
- From the Selector, choose an item.
- Click Menu Ribbon | Home | Copy and then Paste button.
An item can also be duplicated by holding down the CTRL key and dragging the item to a new position in the Selector.
Note: Open Files, when duplicated, will be converted into Topics. When duplicating a Topic in the Search Filter, the duplicate will contain only those sub items that are in the filter and their captions will contain the word [Filtered].
You can make duplicate copies of Notes, Topics, Calendars, or any item in the Selector. For example, if you are writing an important memo you might want to create a duplicate to try another variation.
Group Commands
You can apply commands to all items within a Topic at once. For example, you might want to issue the Send command to all e-mails in a specific Topic.
[:] To apply a command to all items within a Topic:
- In the Selector, choose the Topic and expand it.
- Perform the desired command.
- Acknowledge the confirmation dialog.
Note: The confirmation dialog may have 3 options:
Main Item – the command is applied to a selected Topic only
Children – the command is applied to sub-items only
All descendants – the command is applied to all sub-items, and to items in sub-topics of the selected topic, etc.
It is possible to check either one, or all three options.
Multiple selection
In the Selector, you can choose several items at once and apply a command to all of them. For example, you could select five items and then choose the delete command. The items must be located in the same Topic.
[:] To select multiple items:
- Select the items with the mouse (by clicking on the caption text) while holding down the CTRL key on the keyboard. To multi-select several items in sequence, select the first item, hold down the SHIFT key, and select the last item. To select all items above the current item, press SHIFT+HOME. To select all items below – press SHIFT+END.
- Apply the desired command. Most Info Select commands are compatible with multiple selection.
To perform group operations on items produced by a search, group them first using the Split command.
Tip: To multi-select all items in a topic, highlight any item inside the topic and click Menu Ribbon | Home |Select All button (or press CTRL+A).
Undoing Changes
You can Undo changes you make in the Selector and changes you make while editing text. You can Undo one step or several.
[:] To Undo a change:
- Click in the Selector if you want to undo a Selector change (for example, moving an item). Click in the Note text if you wish to undo editing changes.
- Click the Menu Ribbon | Home | Undo button.
- Repeat if needed.
You can Redo an Undo command by clicking the Menu Ribbon | Home | Redo button
You can undo everything you did to a specific File back to the last save to disk.
[:] To Undo all changes to a File since the last save:
- Select a File.
- Choose Menu Ribbon | Home | Open | Revert. A dialog box appears.
- Select the file to revert to and click OK. Click here for more information about the Revert operation.
Note: The last undone step will be indicated in the Status Bar.
Changing Data Types
You can change an item of one type into an item of another type, such as a Note into a Topic. For example, if you have a list of items in a Note you might prefer to organize the items as Topics in outline form in the Selector.
[:] To change an item from one type to another:
- In the Selector, choose the item.
- Choose Menu Ribbon | Selector | Change Into and select the desired type.
Tip: Before changing an item into another data type you might want to make a copy in case the conversion does not meet your needs.
Below are some comments on certain combinations:
Note to Topic
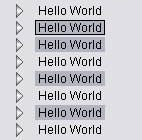
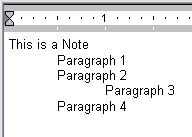
A Note converted into a Topic will be broken down at each line that ends in a hard return or, if present, at each Split Marker. The Split Marker is set in Menu Ribbon | Home | Tools | Options | Editor | Note Delimiter (the default setting is two dashes alone on a line.) The new Topic will have the same caption as the original Note. Using Split Markers to convert a Note into a Topic is useful when dividing large Notes into manageable sections. If a Note contains indented paragraphs, then they will be converted into sub-topics upon changing this Note into a Topic:
will be converted into:
Topic or Form to Database
A Form or a Topic containing Forms can be converted into a Database. The new Database will contain one Record for each Form.
Topic to Webpage
A Topic containing a web address can be changed into a Web Page item.
Note to Database
A Note in comma delimited form can be converted into a Database. The Note’s data must have double quotation marks around each field and each field must be separated by a comma or space (e.g., “Smith”,”John”,”555-1212″). Each record must be on a separate line. You can choose to use the values from the first record as field names.
Note to Form
A Note can be converted into a form if the Note has fields delineated by a designated Field Delimiter, specified in Menu Ribbon | Home | Tools | Options | Editor | Locate fields in text forms using this char.
Note to Field
A Note can be converted into a Database field.
Note to E-mail message
A Note can be converted to an E-mail message. The text of the Note will be used as the text of a Message field of an E-mail.
Topic into Delivery
A topic containing an e-mail address as the caption can be changed into a Delivery item. The caption of the Topic will be used as a default e-mail address of the Delivery.
Note to Report
A Note can be converted into a Report. The text of the Note will be used as the text for the Report.
Any item to Note
Most items can be converted into a Note. For example, you can convert a Calendar into a Note (provided Tools | Options | Calendar | General | When converting Calendar to Note use all data… option is enabled).
Topic to File or File to Topic
You can convert Topics to Files and Files to Topics. See Files.
Form to Topic
A Form can be converted into a Topic. The fields of the Form become sub items of the Topic. You will no longer be able to tab between fields.
Database to Topic
A Database can be converted into a Topic. If the Database has multiple fields, the resulting Topic will contain a Form for each record. If the Database has one field, the resulting Topic will contain Topics with captions representing the data in that one field.
File Manager into Topic
A File Manager item can be converted into a Topic containing the files which were listed in the File Manager as File Attachments.
Text File Attachments into Note
A File Attachment containing a text file can be converted into a Note.
Topic to Note
A Topic can be converted into a Note. This conversion can be done in two ways:
| Structured by indenting | Structured by font |
| Animals Birds Mammals |
Animals Birds Mammals |
The method used is set in Menu Ribbon | Home | Tools | Options | Outline. This setting also controls how Topics are printed.
[:] To have Topics appear as indented outlines:
- Choose Menu Ribbon | Home | Tools | Options | Outline. A dialog box appears.
- Click Indentation (Topics as indented outlines).
- Select Use the Tab character to create the indentation if you want to use the tab character to create the indentation, or use Custom indentation and enter the size of each indentation level. Check Include only item captions on printouts if you want to retain only the information in the Selector and not the text in the Workspace.
[:] To have Topics appear structured by font:
- Choose Menu Ribbon | Home | Tools | Options | Outline. A dialog box appears.
- Select Point Size (Topics structured by font). For Insert Page Break for Captions at Level, enter 1 if you want page breaks at the first indentation level, or enter 0 if you do not want page breaks. Check Include only item captions on printouts if you want to retain only the information in the Selector and not the body text of sub items such as Notes.
- Click Select Font for each outline level. A dialog box will appear.
- Click each button to select the desired font and point size for various caption indentation levels. For example, if your Note Text (set via Menu Ribbon | Home | Tools | Options | Font | Notes, Documents, Grids) is set to 10 pt Arial, set caption Level 1 (the most indented captions) to 12 point Arial; caption Level 2 (the 2nd to most indented captions) to 14 point Arial; and so on.
- Click OK to both dialogs
Read-Only Mode
Read-Only Mode
You can protect items from being edited or changed. For example, you might want to prevent accidental changes from being made to a document sent for publication.
[:] To enable or disable read-only mode:
- In the Selector, choose the item and collapse it.
- Choose Menu Ribbon | Selector | Read-Only and confirm. This will toggle the item between read-only and normal modes. A read-only icon
 will turn on or off.
Troubleshooting
In case of problems disabling the read-only mode, try the following:
- Insure that the file attributes for your *.WD3 files are not set to “Read-Only” (these files have the
 icon).1. In Windows Explorer open the Info Select directory (usually C:\Program Files\Info Select).
2. Right-click on the file and choose Properties.
3. Uncheck Read-only and click OK.
- Check if other users on your LAN have the same file open.
- Reboot your computer.
- Check if there are multiple copies of the same file in the Selector:1. Choose Menu Ribbon | Home | Filter | By Type | Files to filter the File items.
2. For duplicate files, choose Menu Ribbon | Home | Open | Close, then press DELETE and confirm deleting the file from SELECTOR ONLY.
- Choose Menu Ribbon | Home | Options | Local Mail and uncheck all checkboxes. Also, empty the path to the local mail file.
Linking
You can link items in the Selector. For example, you could link the record of a person’s address in a Database to a Topic containing notes about that person. Or you could link a Note about a person to an appointment to call them.
[:] To link items:
- Select the first item and choose Menu Ribbon | Selector | Link | Start Link. A link icon
 appears.
 - Select the next item and choose Menu Ribbon | Selector | Link | Link To | Last Started… to add the item to link chain. The Link To list contains the initial items for all Link chains in the Selector, so you can link the selected item to any existing Link chain. Repeat this step for all items you wish to link.
To jump from one linked item to the next click the link icon.
To unlink an item highlight the linked item, press DELETE and click the Link Only button or choose Menu Ribbon | Selector | Link | Remove. Although a link is deleted, you can follow the link to remove additional links in a chain by choosing Menu Ribbon | Selector | Link | Goto Link (or press CTRL + SHIFT + L).
Note: Linking items is just one way to organize information in Info Select. You can also place related items in the same Topic or Folder. Linking usually works best for a small number of items.
ToDo Icon
You can mark a Selector item as a ToDo item to remind yourself that a task needs to be done. An icon representing the ToDo item will appear in the Selector. ToDo icons vary by color according to their priority:
![]() Low
Low
![]() Normal
Normal
![]() High
High
[:] To mark an item as a ToDo task:
- In the Selector, right click on the item.
- Choose Todo and select the ToDo priority from the list.
or…
- In the Selector, choose an item and press CTRL+H
Note: The Todo icon will display on the item’s parent if the parent is collapsed. This insures that Todo items are always visible.
To filter all ToDo items, check Menu Ribbon | Home | Filter | By Type | Todo items and click OK.
To remove all ToDo items in a Topic, collapse the Topic and then right-click on it and choose Remove ToDo Marks from the pop-up menu.
Tip: You can combine Todo icons with Checkmarks.
Checkmark Icon
You can add Checkmarks to Selector items. For example, you may want to create a checklist for a trip.
[:] To add a Checkmark to an item:
- Highlight the item in the Selector.
- Choose Menu Ribbon | Edit | Properties | Checkmark. A Checkmark box will appear near the selected item.
![]()
[:] To check or uncheck a Checkmark:
- Click on the Checkmark box.
Tip: To filter all items with Checkmarks, check Menu Ribbon | Home | Filter | By Type | Checkmarks and click OK.
Recycle Bin
Much of the information you enter in Info Select is information you will want to keep for reference. You may want to delete certain transient information, such as completed tasks. There is a gray area in between information that is no longer important but that you are not ready to delete. You can place such information in a Recycle Bin. The Recycle Bin flags data that falls into this gray area and removes the data from your attention. Info Select can place deleted data into a Recycle Bin automatically (also see “Creating and Deleting Items“).
[:] To create a Recycle Bin:
- Choose Menu Ribbon | Insert | Recycle Bin.
- Enter a caption or press ENTER to use the default caption.
Note: You can create as many Recycle Bins as you need.
Data, placed in a Recycle Bin can be automatically restored:
[:] To restore items from a Recycle Bin:
- Expand the Recycle Bin item in the Selector.
- Highlight the necessary item (or multiple items) then right-click in the Selector and choose Restore. The selected items will be moved to their previous location.
Note: If you place an item in a Recycle Bin manually, it will be restored to the top of the Selector – below the Overview.
To restore all items, collapse the Recycle Bin item, right-click on it and choose Restore.
If the information in a Recycle Bin is no longer necessary, you can delete it.
[:] To empty a Recycle Bin
- In the Selector, Expand the Recycle Bin item.
- In the Recycle Bin, select the first item.
- Choose Menu Ribbon | Home | Select All.
- Press DELETE.
To set Info Select to empty Recycle Bins automatically after a specified time interval, enable Menu Ribbon | Home | Tools | Options | Misc | Automatically delete items in the Recycle Bin after N days and specify the desired number of days.
IMPORTANT: If you delete data from a Recycle Bin, you will not be able to restore it using Menu Ribbon | Home | Undo.
Note: A Recycle Bin cannot be changed into a File-topic.
Sorting Bin
The HotSpots feature replaces the need for the Sorting Bin feature. It is recommended to use HotSpots instead of the Sorting Bin. The Sorting Bin feature is no longer documented.
Templates
Templates
A Template is a model from which copies can easily be made. You can create your own Templates. For example you might create a Template for invoices, fax cover sheets, letterheads, repeated sections of outlines, shipping labels, etc.
[:] To create a Template:
- Choose Insert and select a data type such as Note.
- Enter a name for the Template. The caption must appear in the Selector without quotation marks. The caption will appear later in the Template menu. (If you want to be able to choose the Template from the menu using a letter on the keyboard, place an ampersand “&” before the letter in the caption (e.g., P&roposal would be selected via ALT + M, R since the ampersand is placed before the R).
- Edit the item to include the desired information. For example, if creating a Template for business correspondence, enter the return address heading, letter opening, and salutation. If you are making a Note Template, place the symbol ^ (caret) at the point where you will want to begin entering data.
- Press ESC to finish editing.
- With the Template still selected in the Selector choose Menu Ribbon | Insert | Template | Add Template. You will see an
 icon appear in the Selector. This icon represents a drop-down menu.
 - Choose Menu Ribbon Insert | Template to verify that the template was added to the Template menu.
Note: The Template menu items are sorted alphabetically.
Once your master Template has been created you can generate a copy of the master at any time. For example, if you need to write a business letter you might invoke a Business Letter Template.
[:] To use a Template:
- From the Menu Ribbon | Insert | Template dropdown list, select the desired Template. A copy of the master Template will appear in the Selector.
- Enter your data in the Workspace.
- If desired you can edit the caption in the Selector.
You can remove a Template from the Template menu. For example, you might want to remove a Template you no longer use.
[:] To remove a Template:
- In the Selector, choose the Template (showing the Template icon).
- Choose Menu Ribbon | Insert | Template | Remove Template or to completely delete the Template, press the DELETE key.
You can create Templates that process data from a Database Record. For example, you could create a Template of your letterhead and merge data from a Name & Address Database.
[:] To prepare a Template that retrieves data from a Database Record:
- Choose Menu Ribbon | Insert | Insert Note.
- Enter an appropriate caption and press ENTER.
- In the Workspace include the desired Database field names in braces. (You can suppress a blank field such as an optional second line of an address by placing the field name in double braces as in {{addr2}}.) For example:
| My Company Name 123 Main Street Anytown, NJ 07602{First} {Last} {Firm} {Addr1} {Addr2} {City} {St} {Zip}Dear {First}:Sincerely, Mary Smith President |
4. With the Template still highlighted in the Selector choose Menu Ribbon | Insert | Template | Add Template.
[:] To use a Database Template:
- In the Selector choose a Record in the Database.
- From the Menu Ribbon | Insert | Template dropdown list, choose the Template. A Note will be placed below the Database in the Selector. The Note will contain information from the Template merged with data from the Database Record.
You can set the order of Templates listed in the Template menu. For example you might want to put the Templates most often used at the top.
[:] To set the order of items on the Template menu:
- Arrange the Templates in the desired order in the Selector.
- Close and restart Info Select.
Default Templates
When you create a new Note, for example, it has “default” settings that give it a certain shape, size, frame, color, content, time/date stamp etc. You can control how you want new Notes, or other item types, to appear by creating a Default Template. For example, you may want all new Notes to appear in a small sizable window with a yellow background and today’s date.
[:] To set the appearance and options for new Notes:
- Choose Menu Ribbon | Insert | Insert Note. If the new Note contains text and you want new Notes to be blank, delete the text.
- Choose Menu Ribbon | Home | Tools | Options | Default Template and click the Set Default Template button. You will see a Default Template icon
 appear in the Selector.
 - From the Selector | Properties menu select any desired options. For example, for sizeable windows uncheck Maximized and re-size the window to the size you want for new Notes. The default setting is to use the full Workspace area – to make this setting, check Menu Ribbon | Selector | Properties | Maximized.
- To select a specific background color, right click on the window or Workspace background, select Background Color, and choose a color. Selecting Default will ensure that the background color changes with any changes to the default colors set from Windows Control Panel.
- To automatically time or date stamp new Notes insert @T and/or @D respectively inside the Default Template in the Workspace. Place the symbol ^ after the @D/@T (with a space to the left of the ^ if desired) to specify where you want to start editing new Notes.
- You can move the Default Template to any location in the Selector except a File that you might close.
You can create Default Templates for other items on the Insert menu in a similar manner. When creating a Default Template for an item that can be expanded and collapsed, collapse it first.
To deactivate a Default Template and revert to factory settings, delete the Default Template from the Selector, or, if you can’t find the Default Template, create a new item and choose Menu Ribbon | Home | Tools | Options | Default Template | Set Default Template twice. To view all Default Template items check Menu Ribbon | Home | Filter | By Type | Default Templates and click OK.
Web Features
Web Features
This section describes Info Select Web features such as the Web Viewer and storing Web adresses (URLs).
Web Addresses
As you surf the Internet, you can collect and save web addresses for safekeeping and organizing. For example you might want to organize a web address for a vendor along with notes about that vendor.
[:] To place a web address in the Selector:
- In your browser, highlight the web address.
- Press CTRL + C to place the web address on the clipboard.
- Go into Info Select and choose Menu Ribbon | Home | Paste. A new Topic will be created with the web address as the caption.
- Drag the web address into another Topic if desired.
[:] To direct your web browser to a web site stored in a Topic caption:
- Select the Topic.
- Choose Menu Ribbon | Home | Go To Web Address (or press CTRL+F12).
You can change the web address into a Web Page item to view the web page directly in Info Select.
[:] To change the web address into a Web Page item:
- Highlight a topic containing the web address as the caption.
- Choose Menu Ribbon | Edit | Change Into | Web Page.
You can manually enter web addresses into Info Select. For example, you may get an address during a phone call and want to store it.
[:] To manually enter a web address into Info Select:
- Select the item where you want to enter the web address into Info Select. This might be a Note containing other web addresses or the Topic you have established for that person or company.
- Type the full web address in the format www.host.domain, or an e-mail address in the format user@host.domain. Web addresses can begin with http://, ftp://, file://, etc.
You can edit an underlined web or e-mail address in a Note. For example, you may discover the address is wrong and needs to be changed.
[:] To edit an existing web or e-mail address inside a Note or Form:
- Right-click on the address you want to edit.
- Choose Edit Hyperlink… (or Edit Recipient… for e-mail addresses)
- In the Label and Address fields, change the text that will appear in Info Select and the URL address of the recipient.
- Click OK when finished.
or
- Edit the address as regular text.
[:] To direct your browser to a web site stored in the text of a Note:
- Move the mouse pointer over the web address.
- Hold the CTRL key and click the left mouse button.
This feature is supported only by browsers supporting standard conventions, such as Netscape and Microsoft’s Internet Explorer. Info Select simply hands URLs over to the operating system to decide which browser to use (normally the last installed browser). When you start your browser the first time, it should ask whether you want to make it the default browser. If this feature is not working, consider reinstalling your browser to ensure it is set to the default browser.
You can disable underlining hyperlinks in Info Select notes.
[:] To disable underlining hyperlinks:
- Uncheck Tools | Options | Internet | Launch my browser when a hyperlink is clicked.
Tip: Use the Web Viewer to browse web pages directly from Info Select.
Web Viewer
You can view web pages directly in Info Select. For example, you could enter a link to your favorite weather site so that a single click in the Selector will display the weather forecast.
[:] To view a web page in Info Select:
- Choose Menu Ribbon | Edit | Web Page.
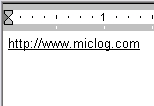
- Type in a web address (e.g. www.miclog.com) and press ENTER. Info Select will attempt to connect to the specified address and retrieve the web page contents.
You can create captions for Web Page items in the Selector. For example, you might caption a web page “Good list of fabric vendors”.
[:] To add a caption for the Web Page item:
- In the Selector, highlight a Web Page item.
- Press F2 to edit it’s caption.
- Enter the desired text and press ENTER. The caption will appear before the web address (i.e. Micro Logic – www.miclog.com).
To edit the URL of a Web Page item, right-click on the Web Viewer icon in the Selector.
Notes:
When you drop a URL into the Selector a new Web Page item pointing to this URL will be automatically created. To disable such behavior uncheck Menu Ribbon | Home | Options… | Internet | Create a Web Page item when dropping URL or HTML document into Selector.
You can use the Web Viewer items to display HTML documents which are stored on your hard drive. Enter a path to a document in the Web Page item’s caption. For example, “C:\Documents\document.html”.
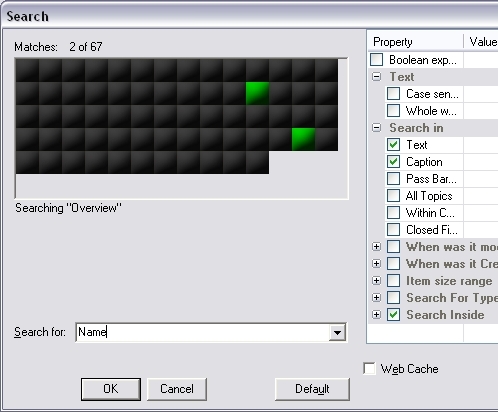
To search the contents of the Web Page items use the Search feature.
Image item
Intro to Images
You can use Info Select to store and edit images. For example, you may want to keep photos related to office space you have examined for a company expansion project, keep images of program screens such as error messages, or pictures of real-estate properties. Images are stored in special Image items in JPEG or PNG formats.
Inserting Images
You can insert images in Info Select. For example you might want to save an image you found on a web site for later use.
[:] To insert an Image:
- Choose Menu Ribbon | Edit | Image | From File…. A dialog box appears.
- Select the necessary image file. The following image formats are supported: GIF, JPEG, PNG, WMF, and BMP.
- Click Insert.
- Enter the image caption and press ENTER.
or
- Copy the image from another application (e.g. for Internet Explorer images right-click on the image and choose Copy).
- Click on the desired location in the Selector and choose Menu Ribbon | Home | Paste.
or for JPEG, PNG, BMP, WMF and GIF images:
- Choose Menu Ribbon | Home | Open | Import….
- Select the appropriate type from the Files of type drop-down list.
- Select the file directory and name. You can select several files at once by holding down the CTRL key while you select files.
- Click OK.
or insert a blank image:
- Choose Menu Ribbon | Edit | Image | New (Empty)
or to store an image of a program screen or dialog or error message:
- At the desired application or dialog press Alt + Print Scr
- Go to Info Select and choose Menu Ribbon | Home | Paste.
You can specify the file format in which the image will be stored in the Info Select database.
[:] To choose the image storage format:
- In the Selector, choose the image.
- Select Menu Ribbon | Image | JPEG Format or PNG Format.
Editing Images
You can edit images stored in Info Select by modifying their size, quality, orientation, colors, brightness/contrast, adding text, drawing freeform lines, adding borders, changing canvas size, etc.
When an Image item is highlighted in the Selector, the Image Ribbon appears in the Menu Ribbon and the image itself is shown in the Workspace.
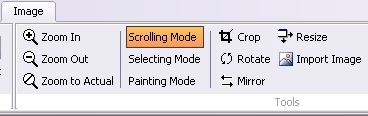
Determine the meaning of any button by pointing to the button with the mouse. From left to right, the buttons function as follows:
Zoom In
Click this button to magnify the image (or choose Menu Ribbon | Image | Zoom In). The zoom ratio will be displayed in the Info section of the Image Ribbon.

Zoom to Actual
Click this button to return to actual image size. The zoom ratio will be displayed in the Info section of the Menu Ribbon (100%). Click again to fit the image to the Workspace. The Infosection will contain the word “Fit”.
Zoom Out
Click this button to zoom out. Click Zoom to Actual to return to the actual size of the image. The zoom ratio will be displayed in the Info section of the Image Ribbon.
Scrolling Mode
Enable this mode to scroll images if they don’t fit the Workspace.
[:] To scroll an image:
- Enable the Menu Ribbon Image | Scrolling Mode option.
- Click and drag on the image in the Workspace to move it.
Note: Images that fit the Workspace cannot be scrolled.
Selecting Mode
You can select a rectangular portion of an image. For example, you might want to copy and paste a portion of an image.
[:] To make a rectangular selection in an image:
- Enable Menu Ribbon Image | Selecting Mode option.
- Click on the image in the Workspace and drag the mouse to define a rectangular selection area.
- Release the mouse button. The selected rectangle will be highlighted with a dashed line.
Painting Mode
You can draw freeform lines using a brush of a specified color and size. For example you might want to add a red arrow pointing to something in an image prior to emailing the image.
[:] To draw a freeform line:
- Enable Menu Ribbon Image | Painting Mode option.
- Select the desired color in the dropdown box on the Image Menu Ribbon.
- Click on the image in the Workspace, and drag the mouse to draw. Hold CTRL key to draw straight horizontal lines. Hold SHIFT key to draw straight vertical lines. Hold both CTRL and SHIFT to draw straight lines in any direction (the line will be straightened when you release the mouse button).
Note: You can select the desired brush size by right-clicking on the image in the Workspace and choosing the Select Brush… menu. There are six brush sizes available (from 1×1 to 6×6).
Crop
Click this button to crop the image to the selection rectangle.
Rotate
Click this button to rotate the image 90o. To rotate the image 180o click the Rotate button twice.
Mirror
Click this button to mirror the image horizontally. (To mirror vertically, mirror and then rotate 180 degrees.)
Resize
Click this button to display the resize options dialog.
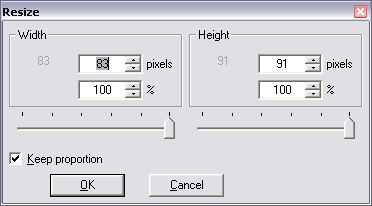
You can modify an image’s size by setting it’s Width and Height values either in Pixels or Percents (or by dragging the corresponding sliders). Changes will be displayed immediately allowing to preview the results. Gray numbers show the initial image size in pixels. Check Keep proportion if you want the image to be resized proportionally. Click OK to accept changes. The size of the image will be shown in the right part of the Image toolbar.
Adjust Brightness/Contrast
Click this button to display the Brightness/Contrast options dialog
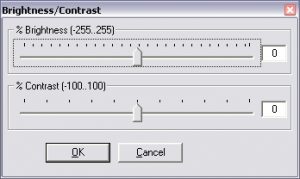
Drag the sliders to modify Brightness or Contrast of the image. Changes will be displayed immediately. Click OK to accept changes.
Black-and-White
Click this button to turn a color image into a grayscale image. Black and White images consume less disk space.
Quality
Click this button to display the Quality adjustment dialog. This feature allows you to select the desired balance between disk size and quality.

Drag the slider to modify the quality and size of the image. Changes are displayed immediately. The size of the image is displayed in the dialog window and changes as you drag the slider . Click OK to accept changes.
IMPORTANT: Modify the quality after all other changes – otherwise the disk size may not remain minimized.
Canvas Size
You can change the size of the image canvas without changing the actual dimensions of the image. For example, you may want to add white space below the image to add some descriptive text.
[:] To change the Canvas Size:
- In the Workspace, right-click on the image and choose Canvas Size…. A dialog box appears:

- In the New Width and New Height boxes enter the new width and height parameters of the image. The Current Width and Current Height boxes display the original Canvas dimensions. Changes will be displayed immediately.
- Check Center Image Horizontally or Center Image Vertically to have the image centered Horizontally or Vertically on the new Canvas. Check both options to have the image appear in the center of the new Canvas. Uncheck both options to set the image placement manually using the Image Placement boxes. Numbers in the Image Placementboxes indicate distance of the image from the Canvas border. Changes will be displayed immediately.
- Click OK to confirm changes.
Adding Borders
You can add borders of any size and color to the existing image. For example, you may want to add a frame to a photo or make a border around an image to paste it into another image.
[:] To add borders to an image:
- In the Workspace, right-click on the image and choose Add Borders…. A dialog box appears:
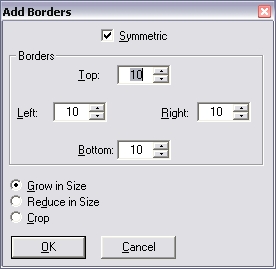
- Set the Borders with in the Top, Right, Bottom and Left boxes. Check Symmetric for symmetric borders (i.e. when adjusting one of the borders, other borders will also have the same width).
-
Choose Grow in Size to have the borders created outside of the image canvas. Choose Reduce in Size to have the borders drawn inside the image canvas. The image size will be decreased to fit within the borders. Choose Crop to have the borders drawn on the image. The images below show the various borders types: original image, outer borders, inner borders, cropped image.

- Click OK to confirm changes.
Adjusting Color Intensity
You can adjust colors of your images by modifying the intensity of Red, Green and Blue colors. For example, you may want to reduce the amount Red color in a low-quality photo.
[:] To adjust color intensity:
-
In the Workspace, right-click on the image and choose Red / Green / Blue…. A dialog box appears:

- Drag the sliders to adjust colors. Click OK to accept changes or use Default button to reset settings.
Combining several images
You can combine several images into one by using Copy and Paste. For example, you may want to create a combination of different variants of the same image (like shown above).
[:] To combine a first image into a second image:
- In the Selector, choose the first image.
- Choose Menu Ribbon | Copy to copy the whole image or select a part of the image (using the Selection Tool), right-click in the selection and choose Copy from the pop-up menu.
- In the Selector, choose the second image. If necessary, resize the image canvas.
- Click on the second image in the Workspace and choose Menu Ribbon Home | Paste.
- Move the pasted image to the desired position by dragging it with your mouse.
Saving edited images to disk
After you edit an image in Info Select you can save it to disk. For example you might want to use the image in another application.
[:] To save an image to disk:
- Choose the image in the Selector
- Choose Menu Ribbon | Home | Save | Export to a File…. A dialog box appears.
- Enter the destination directory, file name and select the desired image file format from the Files of Type drop-down list.
Scanning
Info Select version 11
You can move a step closer to a paperless office by scanning documents and storing the resulting images in Info Select. For example, you might want to scan an article from a magazine and store it in Info Select to avoid cluttering a file cabinet. Additionally, you will have instant access to the information.
[:] To scan a document into Info Select:
-
Choose Menu Ribbon Insert | Image | Select Source….
-
Choose the device that will do the scanning.
or
- Choose Menu Ribbon Insert | Image | From Scanner…. The scanning software included with your scanner will be activated.
-
Follow the instructions in your scanning software.
The image will appear in Info Select as an Image item.
Note: Unless your scanning software converts images into text, your document will be stored in image form (jpg). Images consume significantly more space than text, so you might not want to scan indiscriminately. Also, text in images is not included in searches, so you may want to enter a few keywords in the caption of the image.
To setup Scanning options choose Menu Ribbon Home | Options | Images.
Tip: Use the Image Editing features to modify the scanned image.
[:] To print a scanned image:
- Choose the image.
- Choose Menu Ribbon Home | Print.
Note: Info Select works with scanners through the standard Windows TWAIN system, and therefore it will work with most scanners.
Folders
Intro to Folders
In addition to outlining, Info Select adds another dimension to your ability to categorize information called Folders.
When you are first learning Info Select, use Topics to create categories for your information. You generally use Folders only after you have made substantial use of Topics for classifying your data. Use a Folder whenever you want easy access to a group of items residing in several different Topics.
For example, suppose you have Topics for each department in your company. Each of these Topics contains assorted Notes. Some of the Notes in each department Topic are about things to do. Your To-Do items are not all in one place. To bring your To-Do items together you could create a To-Do Topic, but you would have to spend time moving all your To-Do items into this new Topic. Furthermore, you would lose your original association between the To-Do items and the department Topics.
The Folder feature solves this problem. Use a To-Do Folder to tag your To-Do items. Then, when you want to see the things you have to do, simply view your To-Do Folder. All the to-do items you tagged will be available in the Search Filter regardless of which department Topic the to-do items came from.
Info Select comes with some sample ready-to-use Folders called “Bkmrk” and “Call”. You can add to, delete, or modify these Folders. You can also ignore them and use Topics instead if you would rather focus on just one uniform method of classifying information.
Folders appear on a line below the Menu Ribbon. It is advisable to use short Folder names to conserve space on the Folder bar.
To show or hide the Folder Pane, check or uncheck the “Show Folders” button in the right top corner of Info Select window or the Menu Ribbon | Home | Tools | Options | Toolbars | General | Folders option.
Creating Folders
You can create a new Folder whenever you would like to group items residing in different Topics for quick access. Info Select allows you to create Folders with different Conditions which are applied to the Selector contents when the Folder is activated, though you can always manually add new items to the Folder even if they don’t match the Folder conditions. This significantly widens the range of possible Folder applications. For example, you could create a Folder for fast access to: products you plan to buy or images of a certain person.
[:] To Create a new Folder:
- Right-click in the Folder bar and choose New. A dialog box appears.
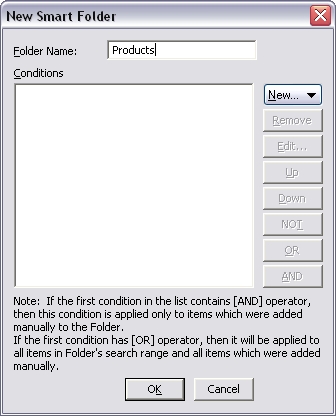
- Type the Folder Name.
- Click New… to select a condition type – Search condition or View by Type condition. The Search condition will affect the items that match a certain search criteria. The View by Type condition will set the folder to filter the items of a certain type – To-Do items, E-mail messages, Images, etc.
- Specify the conditions which you wish to apply to the Folder.
- Click OK to set the condition. The Conditions list will display the topic name from which the search for the matching items will be initiated, search type, and search keyword(s).
- You can add other conditions by clicking the New… button again. Click Remove to remove the selected condition from the Conditions list.
- Use NOT, OR, and AND buttons to set Boolean rules to your conditions. For example, you may want to include in the Folder all e-mail messages from Sam but NOT from Sam Jordan.
- The conditions are applied according to their order in the list, so you can use the UP and Down buttons to change the order of the conditions.
- Click OK. The new Folder will appear on the Folder bar as a new tab.
Note: If you have Folders with Conditions, any new item in the Selector will be automatically added to appropriate folder upon creation. For example, if you set the condition to include all messages from Sam in a Folder, then any new messages from this person will be automatically placed into the appropriate Folder.
Note: Folders with Conditions are shown in pink color.
You can edit Folders to add new or modify existing conditions.
[:] To Edit the Folder properties:
- Right-click on the Folder tab on the Folders Toolbar and choose Properties… from the pop-up menu.
- Add new conditions by clicking New…, or select the condition which you wish to modify and click Edit….
- Set or modify the conditions and click OK.
You can place an item into or remove it from any combination of Folders. For example, you might want to put a Note about a client into a Folder called Clients and in a folder called Todo.
[:] To place or remove an item to/from a Folder:
- In the Selector, choose the item.
- Right-click the Folder tab and select Add to Folder or Remove from Folder. The Folder tab color will change.
- Repeat as needed to place or remove the item from any combination of folders.
You can place all the items which are currently Filtered into a specific Folder.
[:] To add Filtered items to a Folder:
- Right-click on the Folder tab and choose Add Filtered. You can perform this step with any existing Folder or create a new Folder.
Note: If you add a Topic to a Folder, all it’s children are automatically added to the same Folder, and if you place any new items into this Topic, they will be automatically added to the same Folder.
You can remove all items from a Folder without deleting the Folder itself.
[:] To remove all items from a Folder:
- Right-click on the Folder tab to be cleared.
- Choose Clear from the pop-up menu and confirm.
[:] To determine which Folders an item is assigned to:
- Highlight the item in the Selector. Look at the Folder tabs. Any highlighted Folder tab contains the item.
Viewing Folders
You can view a Folder’s contents. For example, if you have assigned all your to-do items to a To-Do Folder, you can view all your to-do items.
[:] To view a Folder’s contents:
- Left-click the Folder’s tab. If the Folder contains something, the Search Filter will become active, showing only the items in the Folder.
When finished viewing the Folder’s contents, exit the Search Filter by choosing Menu Ribbon | Home | Filter | View All Items or, to keep the current item highlighted and leave the Search Filter, choose Menu Ribbon | Home | Filter | View All at Current.
You can view items in a Folder without activating the Search Filter.
[:] To view the next item in a Folder without going into the search filter:
- In the Folder bar, right-click the Folder and select Go Next. The next item in that Folder will be highlighted in the Selector.
Encryption
Intro to Encryption
This section describes how Info Select protects your valuable information from access by others.
Encryption
You can protect your valuable information from access by others. Your data will be protected by the DES encryption method or, if you have PGP Encryption installed (www.pgpi.com), you can opt for PGP Encryption.
|
WARNING |
| If you cannot supply the correct password when you wish to decrypt encrypted data you will have NO WAY TO ACCESS YOUR DATA. There is no “backdoor” method to get to your data if you forget or lose your password. Consider writing your password down and storing it in a secure location. Be sure to give your password to your employer when protecting business information. Passwords are case insensitive. Passwords based on common things like people’s names and birth dates are less secure than truly random passwords – if you can remember your password it’s probably not very secure. Files nested inside encrypted Files are NOT encrypted. Data placed in an encrypted File via dragging or Menu Ribbon | Send/Receive | Send to File… is NOT encrypted until the full file is opened and saved. Encryption does not protect you from unauthorized access while your file is open. Encryption does not affect freed disk clusters that may have parts of data from pre-encryption file-saves – so you may want to run a disk cleaning utility after encrypting a file for the first time. |
[:] To password protect and encrypt a Note or an E-mail Message using Info Select encryption:
- In the Selector, choose the item. It must be a Note or an E-mail Message.
- Choose Menu Ribbon | Home | Encrypt…. A dialog box appears.
- Choose the Use Info Select radio button. Enter a password (up to 21 characters) twice, and click OK. The checkbox options to save the password can be used according to your preferences. If neither checkbox is enabled Info Select will prompt you for the password each time you decrypt the item. Uncheck these options for maximum security.
[:] To password protect a File using Info Select encryption:
- In the Selector, choose the item. It must be a File, a Note, or an E-mail Message.
- Choose Menu Ribbon | Home | Encrypt…. A dialog box appears.
- Enter a password (up to 21 characters) twice, and click OK.
[:] To password protect and encrypt an item using PGP:
- In the Selector, choose the item. It must be Note or an e-mail message.
- Choose Menu Ribbon | Home | Encrypt…. A dialog box appears.
- Choose the Use PGP radio button. Select the desired options (see the PGP documentation) and click OK. The PGP dialog box will appear (see PGP documentation).
If you check the Save password for today option, Info Select will not ask you for the encryption password on the current day. However, it will prompt you for the password on the next day. When you check the Save password permanently option, Info Select will remember the password for the current item permanently, and you will be able to decrypt the item simply by choosing Menu Ribbon | Home | Decrypt…. If neither option is checked, Info Select will prompt you for the encryption password each time you choose Menu Ribbon | Home | Decrypt… to decrypt the item. Uncheck these options for the maximum security. Note that the options are not provided for Files.
[:] To decrypt an encrypted item:
- Choose Menu Ribbon | Home | Decrypt….
- Enter your password.
- Click OK.
[:] To remove password protection and encryption from a File:
- In the Selector, double-click on the File to open it.
- Enter your password.
- Choose Menu Ribbon | Home | Decrypt….
Notes: To protect against someone viewing an encrypted file that you already opened, close the File with the Info Select button | Close command before leaving your computer. Encrypted Files that are open remain encrypted on disk at all times. If you have decrypted an item to view it’s contents, then upon leaving the item you will be prompted to re-encrypt the item to ensure that it will remain encrypted.
Tip: Use the Password Generator to create “hard to pick” password combinations.
Tip: To prevent the encrypted Notes from being accidentally edited check the Menu Ribbon | Home | Tools | Options | Editor | Lock encrypted text from changes option.
Tip: To protect the whole application by password, encrypt the Overview.wd3 file.
For automatic e-mail encryption click here.
Password Generator
The Password Generator utility helps to create complex hard-to-pick passwords to protect your data. For example, you can use such passwords when you wish to encrypt your Notes, Files, or E-mail messages. The passwords are generated when you press the spacebar, so if you wish to create, for example, a password containing 8 symbols then you need to press the spacebar repeatedly 8 times.
[:] To generate a password:
-
Choose Menu Ribbon | Home | Tools | Password Generator. A dialog box appears.
- Enter the Number of characters to specify the password length.
- Check Letters only if you don’t want to include digits into the password. Check Only lower case characters if you don’t want any upper case characters.
- Select the generated password in the Password box and press CTRL+C to copy it to clipboard.
- Click Close to close the Password Generator window.
Now you can paste the copied password into a Note to use for further encryption of your data. Make sure not to forget your password, so consider writing it down and storing it in a secure location.
File Attachments
File Attachments
You can store external files in Info Select. Such files are called Attachments. For example, you could store files related to a certain project (Word Documents, PDF files, JPEG Images, etc.) in a single Info Select data file, and use Info Select to organize and control these files.
Attachments can be inserted into the Selector, Notes or E-mail messages.
[:] To insert an attachment into the Selector:
- Click at the desired location in the Selector Window.
- Choose Menu Ribbon | Insert | Attachment…. A dialog box appears.
- Select the file you want to attach. You can select several files at once by holding down the CTRL key while you select files.
- Click Open. An icon for selected file together with the
 icon will appear in the Selector.
 - Type in the caption of the attachment, or press ENTER to use the name of the file as a caption.
or
- Open Windows Explorer.
- Hold CTRL and drag a file from Windows Explorer into Selector to create an attachment.
If the attachment is an Image file, you can view the image in the workspace:
- Right-click on the attachment.
- Check the View As Image option.
Currently, the following image formats are supported: GIF, JPEG, PNG, WMF, and BMP.
To change an Image file attachment into an Image item:
- Highlight the Image file attachment in the Selector.
- Choose Menu Ribbon | Selector | Change Into | Image.
To change an Image item into an attachment:
- Highlight the Image item in the Selector
- Choose Menu Ribbon | Selector | Change Into | Attachment
[:] To insert an attachment into a Note or E-mail message:
- Place the cursor at the desired location in the Note or E-mail message field.
- Choose Menu Ribbon | E-Mail message | Insert Attachment. A dialog box appears.
- Select the file you want to attach and click Insert. An icon for the attached file will appear in the Note or E-mail message field.
Alternatively, you can drag a file from Windows Explorer into a Note or an E-mail message field to create an attachment. Click here for more information on E-mail attachments.
You can paste Images into your Notes. For example you might want to paste an image of yourself in a letter.
[:] To paste an image into a Note:
- Copy the image to the clipboard.
- Place the mouse cursor at the desired location in the Note text.
- Choose Menu Ribbon | Home | Paste.
Tips:
To create a Thumbnail for the Image, make right-click on the Image in the Note or E-mail and choose Thumbnail from the pop-up menu .
To resize an image inserted into a Note or E-mail message, click on it and then drag the small black squares that will appear at image borders.
Use the Image Editing features to edit image before pasting into a Note or E-mail message.
Tip: To view all Selector attachments and items containing attachments choose Menu Ribbon | Home | Filter | By Type | Attachments.
File Links
You can create File Links instead of File Attachments. File Links contain only the path to a file, so they don’t occupy much space. Double-clicking a File Link will launch the specified file. For example, you can create File Links to launch certain applications directly from Selector.
[:] To insert a File Link:
- Drag the necessary file from Windows Explorer to a desired position in the Selector. An icon for selected file together with the icon will appear in the Selector.
or…
- Choose Menu Ribbon | Insert | Manager…. A dialog box appears.
- Select the necessary file and click OK.
To change a File Link into a Selector Attachment:
- Highlight the File Link in the Selector.
- Choose Menu Ribbon | Selector | Change Into | Attachment.
OLE
OLE
Object Linking & Embedding allows you to store data from other applications in Info Select. For example, you could embed a graphic image or a part of a spreadsheet inside Info Select. OLE allows you to use Info Select as your control center for various information from other applications and to organize and interrelate all your information using Info Select‘s organizing features.
Inserting objects
You can place OLE objects in Info Select from other applications. For example you might want to place in Info Select a range of cells from a spreadsheet.
[:] To place an OLE object from another application into Info Select:
- In the other application choose the item to be embedded in Info Select.
- Choose Edit | Copy.
- In Info Select, highlight an item in the Selector or place the cursor in a Note at the location where you want to place the OLE object.
- Choose Menu Ribbon | Paste | Paste Special.
- Select the desired format and click OK. An icon or image should appear in the Workspace.
You can double-click on an embedded OLE object to edit it.
You can create a new OLE object in Info Select without first creating the item in the other application.
[:] To create a new OLE object:
- Choose the location where you wish to place the object (in the text of a Note or in the Selector)
- Choose Menu Ribbon | Edit | Object….
- Select the desired type and click OK.
- Double-click the OLE icon or image to launch its application and create the data.
You can create an OLE object from a pre-existing File.
[:] To create an OLE object from a File:
- In Info Select, highlight the item in the Selector above which you wish to place the OLE object, or place the cursor in a Note at the location where you want to place the object.
- Choose Menu Ribbon | Edit | Object…, select Create from File, and click the Browse button to find the File you want to insert.
- If you want an icon representing the file to show in the Note, check Display as Icon. Otherwise, you will see the contents of the file displayed in Info Select
- If you want any changes you make to the item to be reflected in the original file, click the Link option. If Link is not selected, any changes made to the object in Info Select will not change the original File.
- Click OK.
You can draw in Info Select through a drawing application.
[:] To draw a picture in Info Select:
- Choose Menu Ribbon | Edit | Object….
- Select Bitmap Image or a drawing program you have installed and click OK.
- Double-click the window in the Workspace to launch the drawing application.
- Draw your picture.
- Click outside of the window to close the drawing application.
Note: It is recommended to use the Image feature to draw in Info Select.
You might want to export an OLE object stored in Info Select to another application.
[:] To export an OLE object to another application:
- Highlight the OLE object and choose Menu Ribbon | Copy.
- Paste the object into the desired application.
Storage size
It is important to understand where the information for OLE objects is stored. The data is stored in the same place as other Info Select data – in temporary memory (RAM) while running Info Select, and permanently on disk in wd3 Files. OLE objects consume memory and disk space more quickly than plain text. Each instance of an OLE object takes its own memory and disk space. As a result, Topics containing many OLE items will take longer to save and load. Any File attachment placed in Info Select uses the same additional amount of space as the original File.
If you paste graphic images directly from the clipboard, the image will be stored uncompressed. To save space with graphic OLE objects, consider first saving the image in a compressed format such as JPG and then inserting the OLE object as a File.
Non OLE images
You can paste BMP, WMF, JPEG and PNG images into a Note without using OLE. Simple place the image on the clipboard and paste into the Note. Or choose Menu Ribbon | Home | Open | Import … to import an image from your hard disk and then copy the imported image into the Note.
Summing a Number Column
Summing a Number Column
You can sum a column of numbers in a Note. For example, you might want to sum a list of inventory values to know the total value in inventory.
[:] To sum a column of numbers:
- Place the cursor below the column of numbers.
- Choose Menu Ribbon | Stamp | Sum… (CTRL+SHIFT+M) and confirm. The sum appears below the column of numbers.
For large amounts of data, it is recommended to use the Database feature.
Tracking Time
Tracking Time
You can use the built-in Timer to track the time you spend. For example, you can keep a record of time spend on a client or time yourself doing certain tasks.
[:] To use the Timer:
-
Choose Menu Ribbon | Home | Tools | Timer (or press ALT + G) to display the Timer dialog:
-
Click Start to start the timer.
-
When finished, click Stop. Use the Reset button to reset the Timer to zero.
- You can copy the Timer value to the clipboard by clicking the Copy time to clipboard button and later use Menu Ribbon | Home | Paste to paste the Timer value into a Note, for example.
Sort
Sorting Lines in a Note
You can sort lines in a Note. For example, if you have a Note containing a list of names, you can sort the names alphabetically.
[:] To prepare for line sorting:
- Designate which column to sort by putting a “+” for ascending or a “-” for descending “column marker” above the leftmost character of the column.
- Remove any blank lines above the column marker.
- If you are using column headings, place a blank line between the headings and the data so the heading is not included in the sort.
- Omit hyphens in column headings.
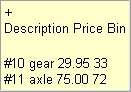
Example of a Note setup for sorting in ascending order by Description:
[:] To sort lines within a Note:
- In the Selector, choose the Note.
- Choose Menu Ribbon | Tools | Sort…. A dialog box appears.
- Confirm the correct number of items to sort by clicking OK.
If the column indicator is omitted, the Note will be sorted in ascending order according to the data in the first column.
A line includes all text up to the first hard return, which can be an entire paragraph.
If you sort from a column other than the first, use a mono-spaced font (e.g., Courier New).
Tab characters should not be used to align field values or to place the column indicator.
Some font information may be removed when sorting.
If the lines in a Note do not sort properly, use a mono spaced font and line up your data. Remove any blank lines above the column indicator. If you are using column headings, include a blank line between the headings and the data.
To sort dates make sure the format of the dates (e.g. 2/11/2002, 2-11-2002, etc.) corresponds to Windows | Control Panel | Regional Settings.
You cannot sort a section of a Note. Instead, divide your data into multiple Notes using the Split command or using Cut & Paste.
When sorting numbers or dates, any information after the number or date is ignored and will not be used to resolve equal data values.
For more control over sorting consider using the Database type.
Sorting Items in a Topic
You can sort items in a Topic by Caption, Size, Date, Type or by specified text within each item. For example you might have a Topic containing a Notes on real-estate locations with the city in each caption and want to sort by the city caption.

[:] To sort items in a Topic by Captions:
- In the Selector, choose the Topic.
- Choose Menu Ribbon | Home | Tools | Sort…. A dialog box appears.
- Select Caption.
- Select Ascending if you want the lowest value items (earliest in the alphabet) to be placed at the top of the Topic, Descending otherwise. Choose Excluding First Item if to start sorting from the second item in the Topic (for example, when you use the first item to describe the Topic contents).
- Click OK.
If the captions do not sort properly, remove spaces at the beginning of each caption. The type of sort (alphanumeric, date, or numeric) is determined by the data found in the first item. For example, you may be intending to do a numeric sort but Info Select sees alphabetic data in the first item and hence the sort result does not appear as expected. If the first caption begins with a number, numeric sorting will be performed and data after the number will be ignored. Note that the format of dates created with the date stamping feature is controlled by your Windows Regional Settings, available through the Control Panel.
You can sort items in a topic by their Size, for example, to place the shortest notes at the beginning of the topic.
[:] To sort items in a Topic by Size:
- In the Selector, choose the Topic.
- Choose Menu Ribbon | Home | Tools | Sort. A dialog box appears.
- Select Size.
- Select Ascending if you want the smallest items (by their size in bytes) to be placed at the top of the Topic, Descending otherwise. Choose Excluding First Item if you wish to start sorting from the second item in the Topic (for example, when you use the first item to describe the Topic contents).
- Click OK.
You can sort items in a topic by Update Date – the date the item was last edited. You might use this type of sort in part of a data clean-up process.
[:] To sort items in a Topic by Date:
- In the Selector, choose the Topic.
- Choose Menu Ribbon | Home | Tools | Sort. A dialog box appears.
- Select Date.
- Select Descending if you want the newest items to be placed at the top of the Topic, Ascending otherwise. Choose Excluding First Item if to start sorting from the second item in the Topic (for example, when you use the first item to describe the Topic contents).
- Click OK.
You can sort items in a Topic by the item Type, bring all Notes together, all images together, etc.
[:] To sort items in a Topic by Type:
- In the Selector, choose the Topic.
- Choose Menu Ribbon | Home | Tools | Sort. A dialog box appears.
- Select Type. Choose Excluding First Item to start sorting from the second item in the Topic (for example, when you use the first item to describe the Topic contents).
- Click OK.
You can sort by text within items. For example, suppose you have a Topic of Notes and each note contains text about a customer including the geographic region of the customer such as “Location: Bergen County”. You could sort the notes by region by specifying the Data Marker “Location”. The Data Marker identifies the “key” which determines the sort order. A Data Marker is comprised of a unique string of characters and must directly precede the “key” data to be sorted.
[:] To sort Notes in a Topic by a specific data marker:
- In each Note enter a Data Marker before the text to be sorted.
- In the Selector, click the Topic.
- Choose Menu Ribbon | Home | Tools | Sort. A dialog box appears.
- Click Data Marker and, in the box, enter the Data Marker character string or leave the Data Marker empty to sort by the first line of each Note.
- Select Ascending if you want the lowest value items (earliest in the alphabet) to be placed at the top of the Topic, Descending otherwise. Choose Excluding First Item to start sorting from the second item in the Topic (for example, when you use the first item to describe the Topic contents).
- Click OK.
You can sort Selector Ticklers within a topic by their Due Date.
[:] To sort Ticklers in a Topic by Due Date:
- In the Selector, choose the Topic.
- Choose Menu Ribbon | Home | Tools | Sort. A dialog box appears.
- Select Tickler Due Date. Select Descending if you want the Ticklers with the most recent Due Date to be placed at the top of the Topic, Ascending otherwise. Choose Excluding First Item to start sorting from the second item in the Topic (for example, when you use the first item to describe the Topic contents).
- Click OK.
Database Sorting
You can sort records in a Database on any field. For example, you could sort a list of foods by calories.
[:] To sort records in a Database:
- From the Selector, choose the Database.
- Choose Menu Ribbon | Home | Tools | Sort…. A dialog box appears.
- Choose the field to sort. Select Ascending if you want the lowest value items (first in the alphabet) to be placed at the top of the Database, Descending otherwise.
- Click OK.
Automatic Sorting
You can automatically sort data in a specific Topic, File or Delivery by Caption, Size, Date or item Type. For example, you could sort a list of clients, catalogs, inventories, etc.
[:] To enable automatic sorting for an item:
- In the Selector highlight a Topic or a Delivery.
- Choose Menu Ribbon | Selector| Properties | Auto Sort… A dialog box appears.
- Check Auto Sort this Topic.
- Select the necessary Sorting and click OK twice. An
 icon will appear before the caption of the selected Topic (or Delivery).
Note: If Automatic Sorting is enabled for a Topic, all new items placed into the topic will be automatically sorted. With automatic sorting you don’t have to resort items each time you add a new item.
Safe Mode
Safe Mode
Info Select has a “Safe Mode” feature that starts Info Select safely after certain errors occur or if Info Select was not closed properly. Safe Mode can occur if you turn off your computer before closing Info Select, or after a power failure.
In Safe Mode, Info Select prompts you to confirm various actions. Normally you can confirm each action. However if one action leads to a crash you can choose to bypass that action on the next startup.
InfoSelect.INI is a special file containing all your custom settings. When Safe Mode asks to confirm loading of InfoSelect.INI, normally it is recommended to confirm. Decline loading of InfoSelect.INI only if you have ongoing trouble and want to use a “factory” clean startup. Choose Startup Normally to disable the Safe Mode and startup normally.
By confirming each separate action during Safe Mode you may be able to isolate a problem.
When you start the application in the Safe Mode, an e-mail message to Technical Support containing your Assertion Log will be automatically generated. You will be prompted to send the Crash Report to the support team immediately, or you can send it later.
Safe Mode can be invoked manually by holding the SHIFT key for 2 seconds while starting Info Select.